
I finally had some time over the Thanksgiving holiday to finish up coding my ‘Holy Grail’ for Blender. I may have mentioned previously that I am a big fan of LuxRender. Unbiased rendering is the way to go, in my thinking. But one thing that has been a big time-sucker is prepping the scenes and objects for rendering in LuxRender. You see, none of the materials from Blender Internal or Cycles are portable over to LuxRender. I would have these tremendously detailed scenes that come from assets I purchased and were more often-than-not Wavefront OBJ based. As-is, Blender imports over OBJ files just fine, and they can render in Blender Internal renderer most of the time. But switch over to LuxRender and you lose the material settings completely. I have solved that. It is based on the framework that Silvio Falcinelli created in his Blender Cycles Converter. If you like Cycles, I highly recommend that Addon.
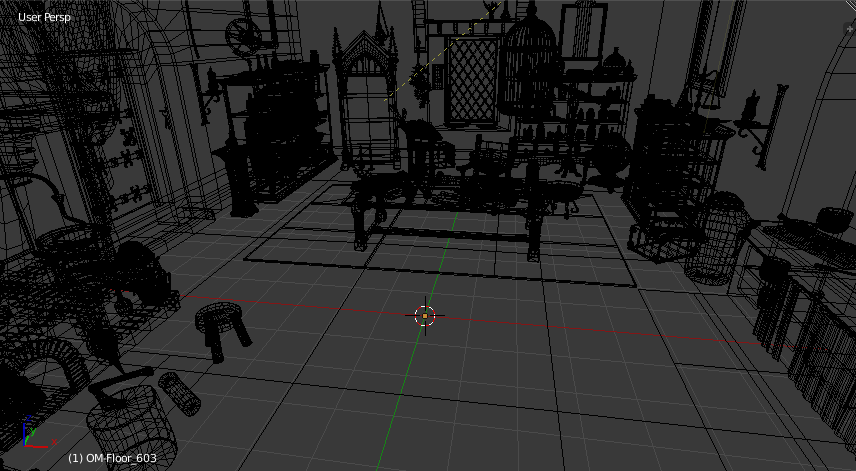
Here I have a very complicated and detailed scene from a DAZ3D asset I purchased. It has 144 objects. Imagine trying to manually apply materials and textures to that! With my Addon, the Blender Internal materials are converted in about 3 seconds. Now you can spend more time tweaking materials and getting your render engine settings just right!
COMPARISON
You can see the differences with the original Blender Renders and then the following LuxRender outputs below the first two.
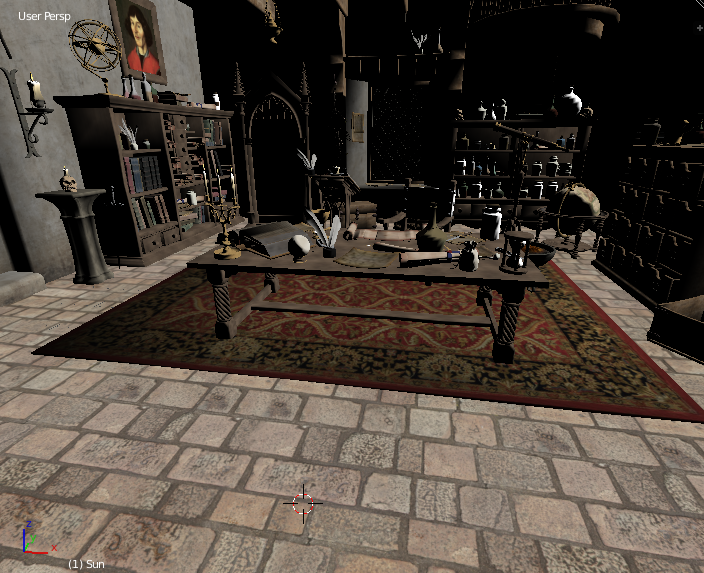
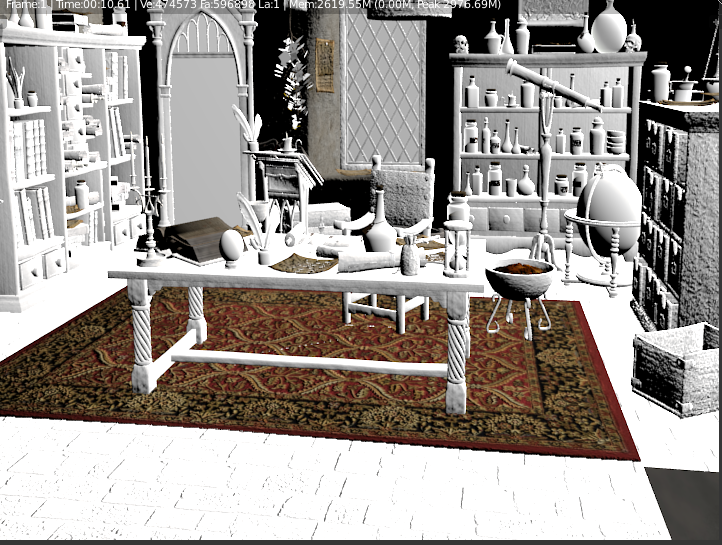
Image on left above is a Blender Render Texture View through 3D Viewport. The unaltered Blender scene imported from an OBJ file seems intact with all textures and materials matching up. The image on the right above is the same scene, only it is rendered with Blender Internal engine. There may be some setting I am missing with Blender Internal, but even though the textures are in the slots, they are not rendering. Interestingly, the bump map images are. Anyway, that is the render without performing any adjustments – pretty disappointing. Blender Internal can get good renders. In fact, if tweaked and adjusted, it can yield good results. I am just saying that this scene “as-is” does not yield realistic results. Then I run my Addon to convert to LuxRender, and then little effort is needed to get a realistic render. I stopped the close-up render below at one hour as it did not have a ‘light portal’ setup. These images were not doctored or post-processed either, just straight out of the Luxrender engine.

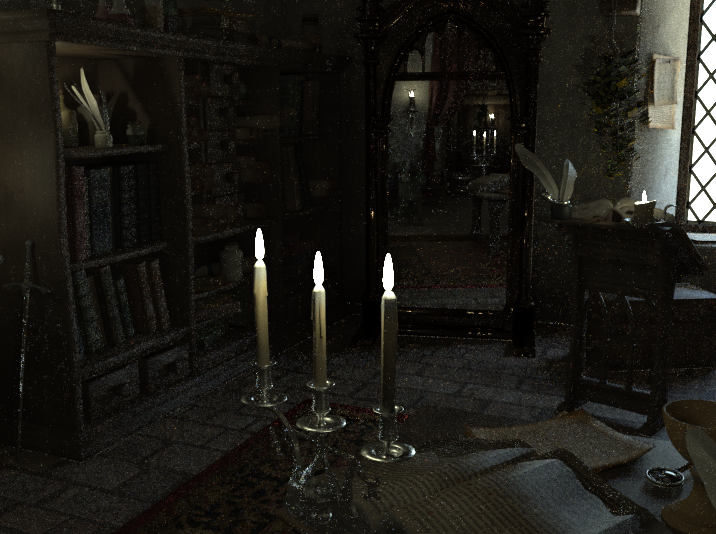
Those images directly above are not doctored or tweaked before rendering. The one on the left was stopped after 2 hours and the one on the right (or below) after one hour. It is actually exciting to take a scene created from OBJ data that you have never messed with the material settings, and render it out for the first time with LuxRender. It is like peering into a new world. This can be a time-saver in your workflow, so you can spend more time on adjusting certain material settings. Good example would be the candles above. the translucent depth and absorption color could be tweaked so you get a good wax effect.
INCLUDED FEATURES
 The interface is fairly simple. You unselect all the objects and click the ‘Convert’ button shown on left. If you are in Cycles engine, it should kick you back to Blender Render before conversion.
The tool (Addon) will convert standard objects and their materials. On top of that it will also convert the following:
- Bump Map Textures
- Light Bulbs and Flames as light emitters
- Mirrors
- All glass and image mapped glass
- Metals
- Skin (by body parts)
The ability to create the material overrides above are based on the material name. For instance, if the material has the word ‘metal’ in the material name, the material will be converted to standard default metal in the LuxRender Material Nodes. In the case of skin, if the material has the word ‘head’ or ‘face’, it will be converted into a rudimentary Glossy Translucent material for taking on the skin image map. All materials have a glossy component except Area Light materials, which are Matte Translucent. They are either Glossy Translucent, Glossy, or Metal. Most things in real life have a reflection component in some form, it depends how much that component is before we see a shine. I pondered whether I would do Cloth, but if an object has an image map and a bump map, it may be overkill to have it on a cloth material base.
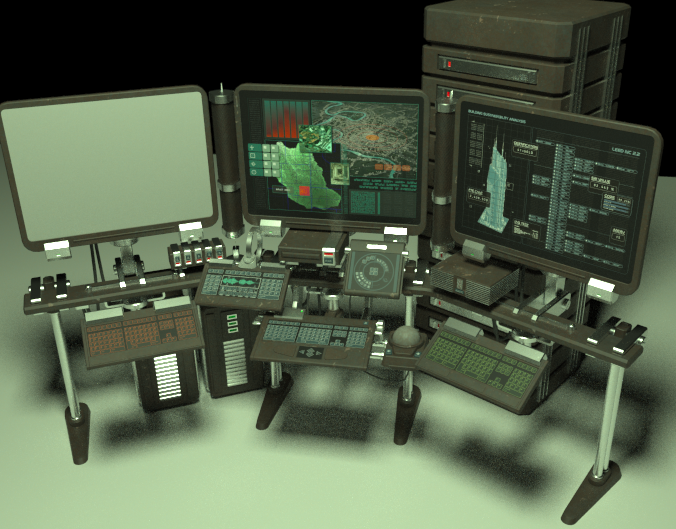 On the left here, to test how it would convert a lightbulb into light, I import an OBJ file, which was a sci-fi tech console. I added a plane for the floor and a plane where a light would be above. I faced the normal towards the object, name the material in ‘Blender Render’ “lightbulb” and then push the ‘convert’ button. The image is exactly how it rendered, except I gave the light a greenish hue. I love not having to do tedious manual material and texture application to get a scene ready to render.
After a little cleanup of the code, I may get it onto the Blender Addon page. In the meantime, I have the Beta here Lux Material Converter. To use in Blender, just place zip file in a known place, and open up ‘User Preferences’. Then choose ‘Addons’ menu item to add the file. At bottom, you choose ‘Install from File’ button and find the zip file. It will add the list of Addons, which you select to activate. The tool only shows when you have selected the ‘Materials’ icon from the main properties window. Here is a Demo Video on its use Demo of Lux Converter . This is an MP4 file, viewable in Quicktime or VLC.